How to remove markup on your phone without a computer
TL;DR
The phone route works only for light annotations. The iPhone Markup eraser undoes strokes that are still editable in the same session; once the photo is saved or received, it cannot touch them. After that your real options are an app that rebuilds the background, such as Snapseed Healing on iOS or Android, or, as a weak last resort, lowering brightness and raising exposure to fade the mark. That only hides it, and a recipient can often bring the mark back.
On iPhone or iPad:
If you drew the markup yourself and have not left the editor, open the photo, tap Edit, open the Markup tool, and erase the stroke. If the markup is baked in, meaning your own saved photo or one someone sent you, the eraser does nothing. Apple Community answers spell this out. The markup eraser only removes elements added with the Markup tools, so a received photo needs a real photo editor. Snapseed's Healing brush is the common free pick for small spots.
On Android:
Android has no system-wide markup eraser for flattened images either. Snapseed, which is free, is the standard answer. Open the photo, choose Healing, and drag a finger across the markup so it samples nearby pixels. It is fine for small scribbles on simple backgrounds and struggles with the same hard cases as everything else, like a face or a block of dense text. A quick caution on the brightness-and-contrast trick that circulates online. Lowering brightness can fade a light marker, but it only reduces visibility; the marked pixels are still there, and anyone can raise the levels to bring the mark back. For anything you actually need clean, the desktop route is the dependable one.
Online vs desktop: which markup remover should you use?
TL;DR
Use a free online markup remover for a small, non-sensitive image and a quick one-off. Use desktop software when the photo is private, high-resolution, part of a batch, or has markup over a face or text. Online tools are convenient but they upload your image to a server, cap file size near 5 to 10 MB, and handle hard reconstructions less reliably, which is a real concern for a screenshot that holds personal details.
Free browser tools like Pokecut will remove a light scribble in two or three clicks, and for a meme or a throwaway screenshot that is perfectly fine. The trade-offs show up with anything that matters: most cap the upload near 5 to 10 MB, so a full 4000 x 3000 phone photo gets downscaled before you even start.
Factor
Online markup remover
Desktop (Photo Stamp Remover)
Privacy
Image uploaded to a server
Stays on your PC, offline
File size / resolution
Often capped near 5-10 MB
Full resolution
Batch
Usually one at a time
Many files in one pass
Hard fills (faces, text)
Hit or miss
AI Generation plus Clone Stamp
Cost
Free, with limits
Free trial, paid license
If the screenshot has a name, an address, or an account number anywhere on it, keep it off third-party servers. Local processing is the safer default, and it is the same logic behind using a desktop tool to remove emojis from a picture you would rather not upload.
Why Photo Stamp Remover fits markup removal
TL;DR
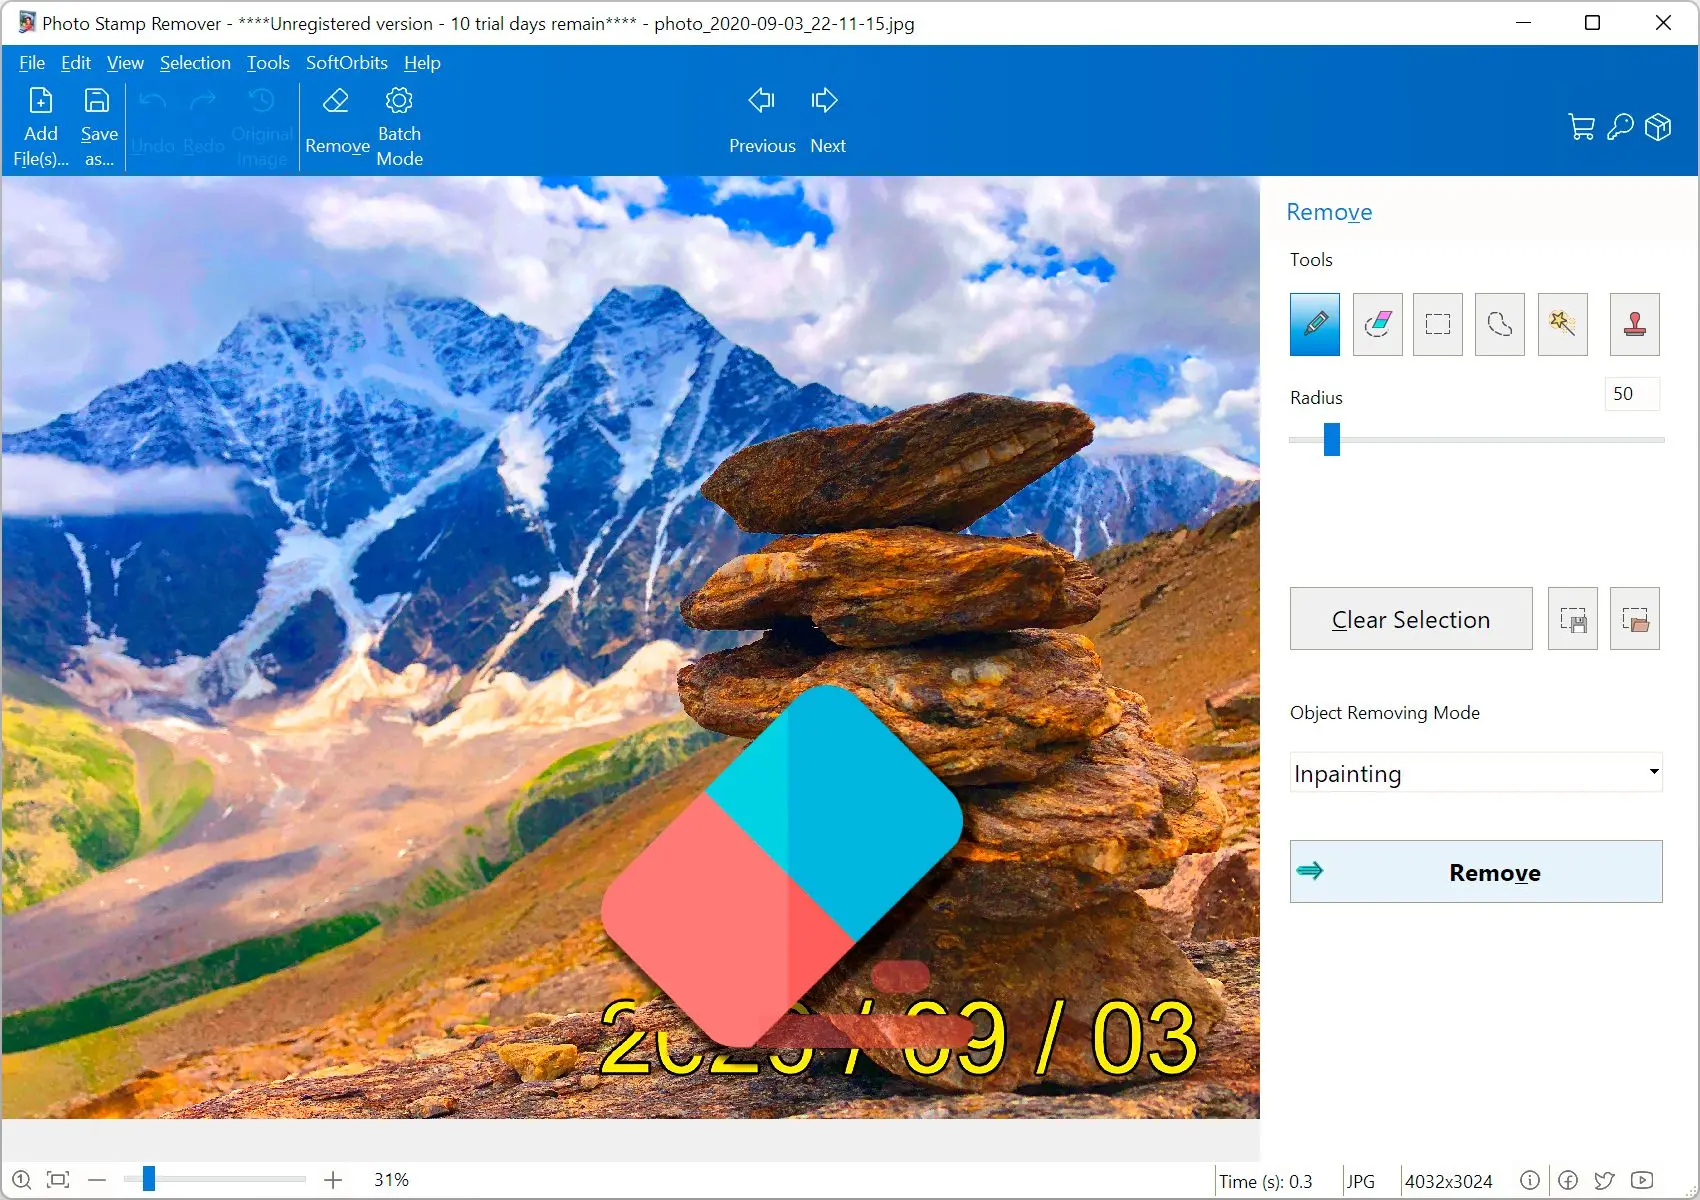
Photo Stamp Remover is built for exactly this job. Select a mark, rebuild the background, move on. Inpainting clears flat areas in a few seconds. AI Generation takes up to a minute but handles faces and printed text. Color Selection grabs a whole scribble in one click, the Clone Stamp cleans the last spots, and the installer runs on Windows 7 through 11.
Pros:
Two removal engines, fast inpainting and AI Generation for faces, text, and patterns
Color Selection grabs a whole colored scribble in one click
Clone Stamp for manual cleanup on tricky backgrounds
Batch a whole folder of marked-up screenshots in one pass, full resolution kept
Cons:
Windows only (7 through 11), no Mac build
Not a full photo editor for retouching beyond object and markup removal
For a reliable desktop fix, use Photo Stamp Remover. The same selection-and-fill workflow also strips captions and watermarks, so it handles a stray date stamp the same way it handles a red marker.
Pitfalls when removing markup from a photo
TL;DR
Most failed cleanups come from expecting an eraser to undo a flattened mark, expecting AI to recover redacted content, or trusting the brightness trick to truly hide something. Know the limits before you start and you avoid the frustration users hit again and again.
✔️ Expecting the markup eraser to work on a saved photo.
The iPhone and Android markup erasers only touch strokes that are still live in the editor. People asking how to remove marks from a photo or screenshot repeatedly hit this after the file is saved. Once it is flattened, reach for software that rebuilds the background.
✔️ Believing AI can un-redact a blacked-out area.
A thick marker over a face or a solid bar over text destroys the original pixels. AI Generation fills a plausible guess; it does not recover what was hidden, as people discover when they try to read paint-covered text in a photo.
✔️ Trusting the brightness trick to hide your own markup.
Fading a marker by lowering brightness leaves the pixels in place. A Quora discussion shows people doing the reverse, raising the levels to read a marker someone thought they had hidden. If you are covering something sensitive, draw a solid opaque shape and flatten it, do not just dim it.
✔️ Uploading a sensitive screenshot to a web tool.
Convenient, but the file lands on someone else's server. For anything with personal data, keep it on your own machine.
✔️ Overwriting your only copy.
Save the cleaned image under a new name. If a fill looks off later, you want the original back to retry with a different tool or method.
Photo Stamp Remover
Markup remover for Windows: remove markup from a photo or screenshot - drawings, scribbles, arrows, black marker - with fast inpainting or AI fill.
Remove unwanted watermarks, text, and logos from all types of images.
Open it in Photo Stamp Remover, brush over the markup with the Marker tool, and click Remove. The inpainting engine fills the area, and it works no matter which app or device added the markup.
Not with the iPhone Markup eraser, which only works on strokes still live in the editor. For a photo someone sent you, use an app that rebuilds the background, such as Snapseed Healing on the phone or Photo Stamp Remover on a PC.
Use Color Selection to grab every red pixel in one click, then Remove. Red contrasts with most screenshot backgrounds, so the selection stays precise and the flat area fills cleanly.
No. AI Generation reconstructs a believable background but cannot recover the original pixels under a solid mark. Thin scribbles and arrows come off with little trace; a fully blacked-out face becomes a plausible invention.
Photo Stamp Remover offers a free trial that covers the full workflow. Free online tools work for small, non-private images but upload your file and cap the size.
Yes. Snapseed has a free Healing brush. Open the screenshot, choose Healing, and wipe across the markup. It suits small scribbles on simple backgrounds.
Select the marker with Color Selection or Marker and click Remove; the tool rebuilds letters from surrounding shapes. Results are best when the marker covers less than about half of each character, since heavier coverage cannot be reliably restored.
 Photo Stamp Remover