Searching for photo sharpening software for Windows means wading through a dozen "best" lists that rank the same paid suites.

  1. 1️⃣ See 7 Windows sharpeners ranked, with honest pros and cons for each.
  2. 2️⃣ Match the right tool to your job, from a quick fix to AI recovery or the free route.
  3. 3️⃣ Learn the over-sharpening mistakes that quietly ruin a photo.
Eugene - CEO at SoftOrbits, Candidate of Technical Sciences, has more than 16 years of expertise in software development, photo and multimedia applications, enhancing and transforming digital images and videos.
📅 Last updated on:  2026-06-12

We tested the tools that actually matter to a Windows user, from a simple desktop fixer to the AI heavyweights and the free open-source route, and ranked them by how well they recover real blur, what they cost, and how they fit a Windows workflow. SoftOrbits makes Easy Photo Unblur, our #1 pick below; we still listed honest strengths and limits for every tool, including our own, so you can compare before you download.

What you will learn
Apply in 15 min Saves 1 hEasy

How We Picked These Sharpeners

TL;DR

We ranked on real blur recovery, halo and noise control, price model, Windows fit, and batch support, weighted by what users report on Reddit and photography forums.

A "best" list is only as honest as its criteria, so here are ours. We weighed five things. How well a tool recovers actual blur, meaning real motion and focus, not just edge contrast. Whether it controls halos and noise instead of trading one for the other. Its price model. How it fits a Windows machine, hardware demands included. And whether it handles batch jobs, not just a single hero image. We leaned on user reports from Reddit and photography forums for the real-world view. One honest boundary. The free tools and our own we used directly on Windows. The paid-only suites like Topaz, DxO, and the Adobe apps we judge from documentation, reviews, and forum track record, not a paid bench test, and we say so when it matters.

The 7 Best Photo Sharpening Tools

TL;DR

Easy Photo Unblur leads for fast offline fixes; Topaz for AI recovery; Photoshop and DxO for control; GIMP for free; Luminar and Lightroom in between.

ToolBest forPrice modelOffline?PlatformBatch
Easy Photo Unblur (ours)Fast offline blur fix, folder jobsPaid, free trialYesWindowsYes
Topaz Photo AIAI recovery on hard, noisy filesPaid (one-time)YesWin / MacYes
Adobe PhotoshopPrecise manual sharpeningSubscriptionYesWin / MacVia actions
Adobe Lightroom ClassicSharpening in a RAW workflowSubscriptionYesWin / MacYes
GIMPFree unsharp maskFreeYesWin / Mac / LinuxLimited
Luminar NeoBeginner AI sharpeningOne-time or subYesWin / MacYes
DxO PhotoLabRAW first-pass sharpeningPaid (one-time)YesWin / MacYes

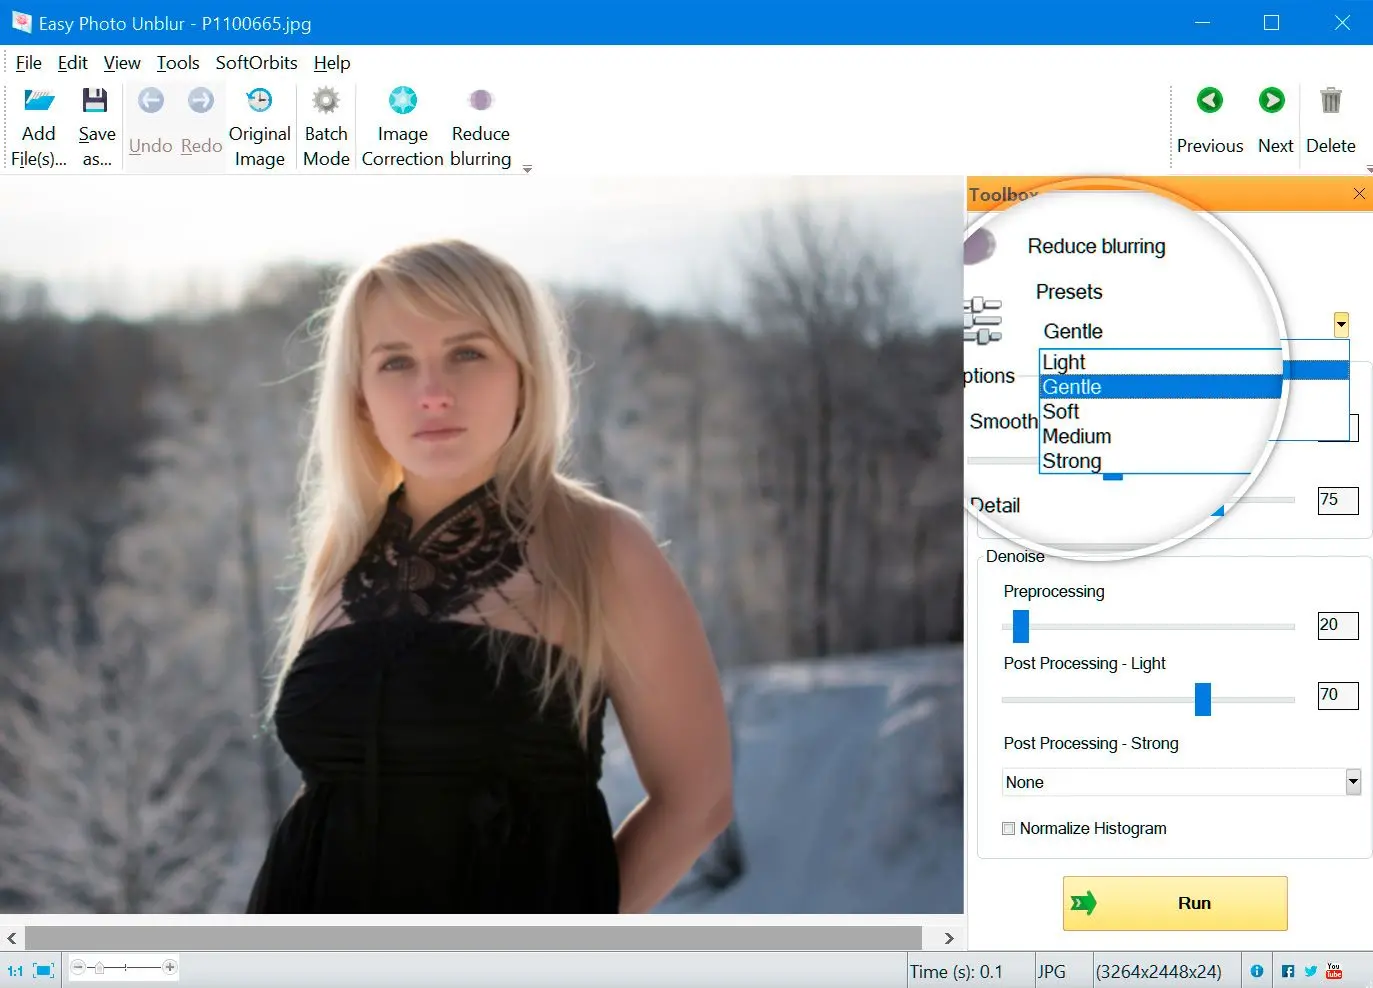
1. Easy Photo Unblur - best for fast, offline blur fixes

Most people who land here have a folder of soft or shaken shots, not one hero image to fuss over. Easy Photo Unblur is built for exactly that. It reads the blur in a photo and corrects it on your own machine, with a preview before you save. It targets motion blur, missed focus, and softness from heavy compression, and it does the work right on your desktop. The workflow is short. Drag in one photo or a whole folder, pick a blur preset that matches the problem, set a post-processing preset to balance sharpness against noise, then press Run and save one image or the batch.

 Easy Photo Unblur sharpening presets on Windows..

Pros:

Targets motion blur and soft focus, not just edge contrast

Batches a whole folder in one pass

Works fully offline; your photos never leave the machine

Full preview before you save; one-time license with a free trial

Cons:

Windows only, no Mac build

Not a full editor, so no layers or RAW catalog

Fewer manual sliders than Photoshop or DxO

Verdict: Choose Easy Photo Unblur to rescue everyday soft and shaken photos in bulk without learning a pro suite.

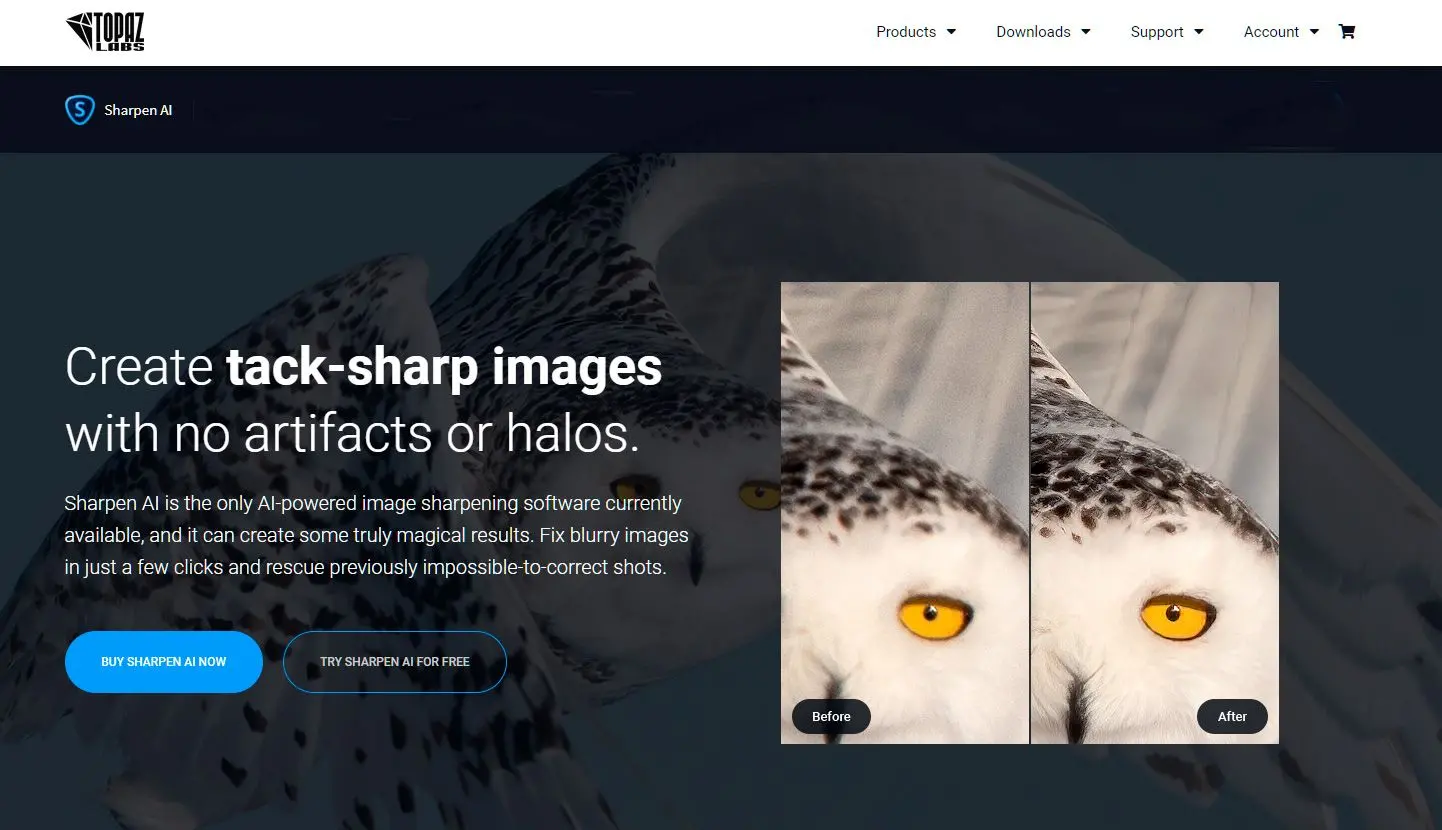
2. Topaz Photo AI - best AI recovery for hard, noisy files

Photographers reach for Topaz when a shot is genuinely damaged by heavy noise, camera shake, or low-res faces. On r/photography, long-time users say it has saved photos other tools could not, then add the catch in the same breath. Its sharpening can create noticeably weird artifacts if you lean on it, and you learn to spot the fake detail after a while. It bundles AI models such as Standard, Strong, Lens Blur, and Motion Blur with manual strength and noise controls.

 Topaz Photo AI sharpening interface..

Pros:

Strong AI recovery on noise, shake, and low-res detail

Several blur-specific AI models with manual control

One-time purchase, no subscription

Cons:

Expensive next to single-purpose tools

Wants 16 GB of RAM and a capable GPU, and renders slowly

Over-sharpens portraits into artifacts if pushed

Verdict: Worth it if you regularly rescue hard files and own the hardware to run it; overkill for the occasional soft snap.
Our take: we did not run a paid license for months, so this is read from reviews and forum threads rather than a bench test. The consistent line from owners is "powerful, but spot-check the output."

3. Adobe Photoshop - best for precise manual sharpening

Photoshop is the standard when you want to decide exactly how much edge contrast lands and where. Its Smart Sharpen and Unsharp Mask filters, plus the High Pass trick, give finer control than any one-button tool, and editors who study it tend to prefer Smart Sharpen over plain Unsharp Mask. Run the filter on a Smart Object and the sharpening stays non-destructive, so you can dial it back later.

Pros:

The most precise manual control (Smart Sharpen, Unsharp Mask, High Pass)

Non-destructive on Smart Objects

Industry standard with endless tutorials

Cons:

Subscription only

Steep learning curve for a simple fix

No automatic deblur; you do the work by hand

Verdict: The pick if you already live in Photoshop and want hands-on control instead of a fix-it button.

4. Adobe Lightroom Classic - best for sharpening inside a RAW workflow

If you shoot RAW and process by the hundred, Lightroom sharpens during conversion in its Detail panel, and the masking slider keeps the effect on edges instead of smooth skin and sky. It is the same subscription as Photoshop and built around a catalog, so sharpening is one step in a managed workflow rather than a standalone tool.

Pros:

Excellent first-pass sharpening on RAW files

Masking slider protects skin and sky

Catalog workflow suits large shoots

Cons:

Subscription only

Not a deblur tool for heavy motion blur

Catalog overhead for a quick one-off

Verdict: Best when sharpening is part of a RAW edit, not the whole job.

5. GIMP - best free sharpener

GIMP is the free, open-source route, and its Unsharp Mask uses the same fundamental technique the paid tools do. It blurs a copy, compares it to the original, and boosts the edge difference above a threshold you set. You get manual radius, amount, and threshold, plus a High Pass option, at no cost. The trade is a dated interface and more patience.

Pros:

Free and open-source

Same unsharp-mask technique as paid editors

Manual radius, amount, and threshold control

Cons:

Dated, fiddly interface

No AI deblur for motion or focus blur

Push it too far and it haloes like any unsharp tool

Verdict: The honest free pick if you will trade polish for price and learn the filters.

6. Luminar Neo - best AI sharpening for beginners

Luminar Neo leans on AI. Its Structure tool sharpens textures across a photo while leaving skin tones alone, so landscapes and architecture crisp up without wrecking portraits. It sells as a one-time license or a subscription and works as a standalone app or a plugin. The catch reviewers note is that its AI sharpening and denoise trail Topaz, and it can be slow to render.

Pros:

AI Structure sharpens textures and protects skin

Beginner-friendly; standalone or plugin

One-time license option

Cons:

AI sharpening weaker than Topaz

Can be slow to render

Easy to over-process on strong settings

Verdict: A friendly middle ground if you want AI help without Photoshop's learning curve.

7. DxO PhotoLab - best for RAW shooters chasing image quality

DxO is the technical pick. Its first-pass RAW conversion sharpening, paired with DeepPRIME denoise and lens corrections, is rated by reviewers above the rest for technical image quality, with little competing on its RAW sharpening. It offers unsharp-mask-style sharpening rather than AI deblur, and it ships as a one-time license aimed at people who care about pixel-level results.

Pros:

Top-rated RAW first-pass sharpening, per reviewers

DeepPRIME denoise and lens corrections built in

One-time license, no subscription

Cons:

Unsharp-mask only, no AI deblur for shake

RAW-centric workflow with a learning curve

Pricey for casual use

Verdict: The choice for RAW shooters chasing maximum technical quality.

What Photo Sharpening Actually Does

TL;DR

Sharpening boosts edge contrast; deconvolution tackles real motion or focus blur. Neither adds detail the lens never captured.

Sharpening does not invent detail. It raises the contrast along edges so the detail already in the file reads as crisp. The common method is unsharp masking, the same idea behind Photoshop's Unsharp Mask filter and GIMP's. The tool makes a blurred copy, compares it to the original, and boosts the difference where the edges sit. That is why a good sharpener can make a photo look crisper without redrawing anything.

True blur is a harder problem. When a shot is soft from motion or missed focus, the fix is closer to blind deconvolution, which estimates how the image was smeared and reverses it. Easy Photo Unblur and the AI tools lean on this approach, so they handle camera shake and out-of-focus shots, not only photos that need a light crisp-up.

Blurred portrait of a cat before sharpening..
Sharp portrait of a cat after sharpening..

One honest limit. Adobe's own documentation is blunt about the ceiling, and so are we. A mildly soft JPG cleans up well. A smeared 400-pixel thumbnail saved twice through chat apps will only go so far. If your goal is to fix a blurry photo end to end, the same engine covers that too.

Sharpening by Image Type

TL;DR

Go light on portraits to protect skin and hair; landscapes take a stronger hand.

The same setting flatters one photo and ruins another. Portraits want a lighter hand. Sharpening lifts the eyes, lashes, and lips a viewer checks first, but push it and pores and blemishes get loud, and a halo can outline the hairline against the background. Landscapes tolerate more. Mountains, trees, and buildings gain a crisp outline, rocks and foliage read with more bite, and there is no skin to betray you. This is exactly why Luminar's skin-aware Structure and Lightroom's masking slider exist, and why a desktop tool with a preview beats guessing.

Blurred sea landscape before sharpening..
Sharp sea landscape after sharpening..

Sharpening vs. Noise Reduction

TL;DR

Sharpening lifts grain and noise reduction softens detail. Balance them and judge at 100 percent.

Sharpening and noise reduction pull in opposite directions. Sharpening raises local contrast, which also makes grain more visible on high-ISO night shots. Heavy noise reduction does the reverse, smoothing grain but softening the detail you are trying to recover. The goal is balance, not the maximum of either. A practical order helps. Tame obvious noise first, then sharpen, and judge the result at 100 percent. This is why the AI tools pair denoise with sharpen, and why Easy Photo Unblur exposes a post-processing preset, so you are not choosing between a sharp-but-grainy file and a clean-but-mushy one.

Free vs. Paid Sharpeners

TL;DR

Free tools handle casual fixes; paid ones earn their price on batch volume, AI recovery, and hard, noisy files.

Free options cover more than people expect. GIMP's Unsharp Mask, the sharpen tools in browser editors, and trial builds all handle a casual fix without a cent. Paid tools earn their price on volume and difficulty. They add batch processing for whole shoots, AI models that pull back real detail on heavy softness, and finer control over the sharpening-versus-noise balance on tricky high-ISO files. A fair test is to run the same hard photo through a free option and a trial of a paid one, then compare at full size. If the free result holds up, keep it. If the paid version recovers detail the free tool missed, the upgrade pays for itself the first busy week. Browser tools like Adobe Express, Picsart, and VanceAI sit in their own lane. They are handy for one quick edit on any device, but they upload your file to a server and slow down on big or batch jobs. If you only need to turn one blurry image clear, any of them works; for repeat work on large files, a desktop sharpener wins on speed and privacy.

Which Sharpening Tool Is Right for You?

TL;DR

Match the tool to the job. A quick batch points to a desktop fixer, hard files to AI, RAW work to Lightroom or DxO, and zero budget to GIMP.

There is no single winner, only a best fit for your job. If you mostly need to clean a batch of soft or shaken everyday photos on Windows, a focused desktop tool like Easy Photo Unblur does it fastest with the least fuss. If you are rescuing genuinely damaged files and own a strong machine, Topaz Photo AI pulls back the most detail. If you want to place every bit of contrast by hand, Photoshop is the control room, and Lightroom or DxO PhotoLab fit when sharpening is one step in a RAW edit. Want to spend nothing? GIMP's free filters are the honest route, and a browser tool covers a single quick edit on a borrowed laptop. Match the tool to the task and you skip both the overkill and the disappointment.

Pitfalls when sharpening a photo

TL;DR

Most sharpening goes wrong in a few familiar ways, from halos and bad timing to pixel-peeping and chasing blur that will not come back.

✔️ Over-sharpening.

Crank the strength and edges grow bright halos while skin and skies turn gritty. On r/photography, people describe prints pushed so hard the halos show. Back the amount down until the detail reads natural.

✔️ Sharpening before you resize.

Shrinking a photo afterward throws away the detail you just emphasized and can re-soften it. The common advice on threads like this r/AffinityPublisher one is to sharpen on export, once the image is sized for where it will be seen.

✔️ Pixel-peeping past 100 percent.

Zoom beyond 100 percent and the screen interpolates, so the photo looks soft no matter how good the file is. That point comes up constantly on r/AskPhotography. Judge sharpness at 100 percent.

✔️ Ignoring noise.

On a high-ISO night shot, sharpening makes grain loud. Tame noise first, then sharpen.

✔️ Chasing a lost cause.

A subject shot from too far and cropped hard, or a smeared low-res file, will not come back fully, since no slider restores detail that was never captured. To remove motion blur, start from the best original you have.

Easy Photo Unblur Easy Photo Unblur
Best photo sharpening software for Windows in 2026: 7 tools tested and ranked - Easy Photo Unblur, Topaz Photo AI, Photoshop, Lightroom, GIMP, Luminar, DxO.


🙋Frequently Asked Questions

It depends on the job. For quick, repeatable fixes on your own machine, Easy Photo Unblur covers motion blur and soft focus with a preview and batch mode. For AI-heavy recovery on damaged files, Topaz Photo AI is the strongest pick if you have the hardware. For free, GIMP works once you learn its filters, and for RAW workflows, Lightroom or DxO PhotoLab sharpen during conversion.

Yes. GIMP is a genuine free option with the same unsharp-mask technique as the paid editors, and most paid tools offer a trial. Paid tools tend to add batch processing, AI recovery models, and finer noise control, which matter when sharpening is a weekly task.

A basic filter raises contrast everywhere, which is what creates halos and crunchy edges. Dedicated tools analyze edges and texture, keep grain in check, and usually look better on portraits and old scans.

Not entirely. It improves clarity on mildly soft images, but it cannot replace optical detail that was never captured. Adobe says the same about a badly blurred shot. If the soft part is small print, our unblur text tool is tuned for that instead.

Online sharpeners and apps are convenient for one-off edits on any device. A desktop program is usually better for large files and batch work, with repeatable presets and your photos kept on the machine.